


Classroom Management Strategies for Centering Activities
Set up separate, clearly labeled sorting stations for each material type, like a pom-pom bin and a button tray, to prevent the chaos of 100 small items from overwhelming your students. You will notice this simple structure lets them focus on counting and placing their pieces, not on hunting through a messy pile. You already know a cluttered desk leads to a cluttered project, so giving each child a large piece of colored construction paper as a base creates a clean, defined workspace. Trust me on this, pre-sorting your bulk materials into groups of ten before the activity starts is the secret to a smooth hour. This approach keeps your 100th day of school crafts routine organized and stress-free. This way, a student can grab one pre-counted baggie and know they have exactly ten pieces to work with, which reinforces that crucial number sense while keeping the project moving.
Selecting Durable Materials for Young Student Hands
Choose flat-backed materials like buttons or punched paper circles over round items like beads for your youngest students, as they are far easier to glue down securely. The good news is, using a low-temperature glue gun with close supervision for third graders and up provides a strong, instant bond that prevents pieces from popping off before display. For the little ones, a washable white school glue in a squeeze bottle with a fine tip offers better control than a stick, but you must budget extra drying time between layers. Here is the thing, cardstock holds up to wet glue and eager hands much better than flimsy paper, making it the ideal base for any project laden with 100 components. This simple material choice ensures the finished work stays intact from the classroom table to the hallway bulletin board, proving that sturdy supplies elevate every set of 100th day of school crafts.
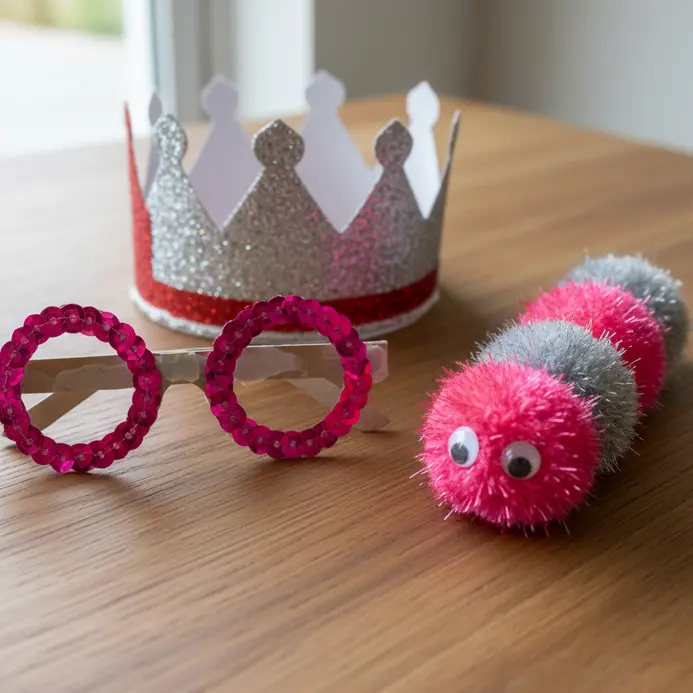
1. Build a Glittered Hundred Days Smarter Crown
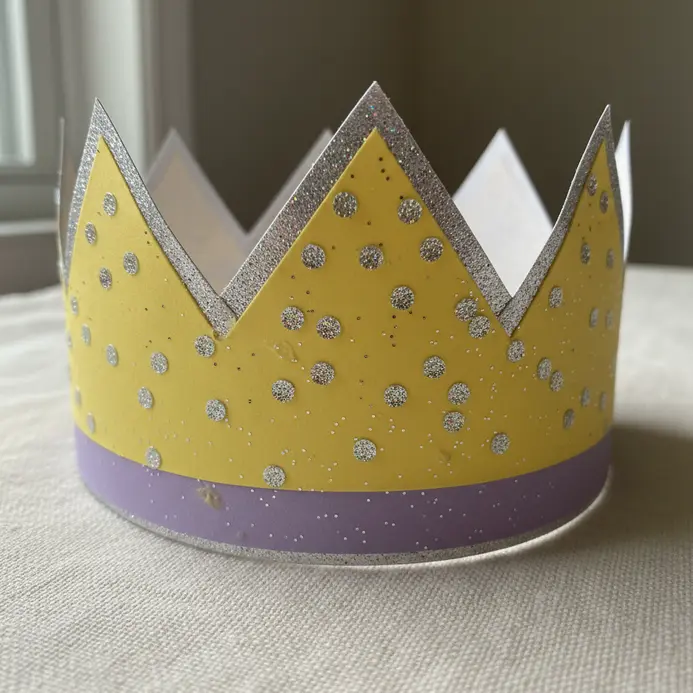
Ever feel like a project should be special from the very first step? This sparkly crown is exactly that kind of celebration. You will start by cutting the base from sturdy white cardstock, making sure it fits around the child’s head. Then comes the fun part—apply glue and pour on the glitter for that magical, festive shine.
Trust me, the look of pride when they wear it makes all the glitter cleanup worth it. It is a fantastic way to mark this school milestone and easily ranks among the most popular 100th day of school crafts.
2. Make Sequined Hundred Days Smarter Glasses
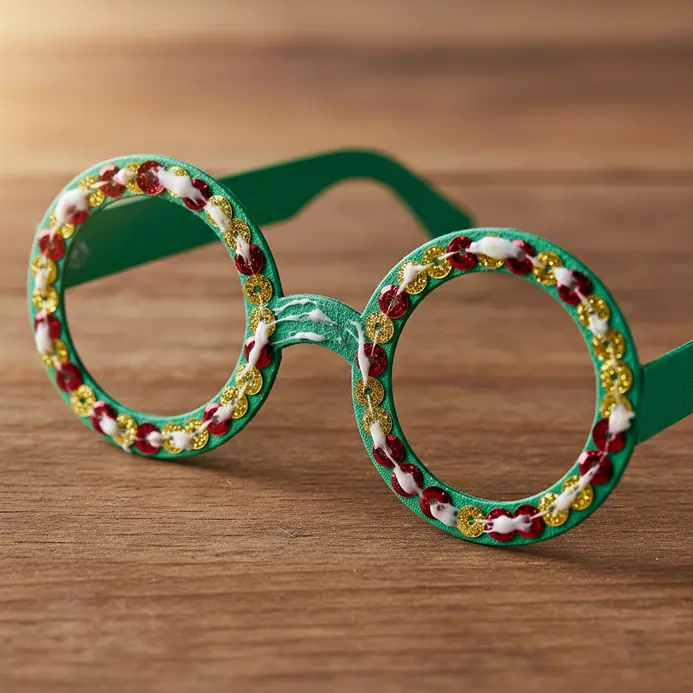
This one surprised me. It looks like a fancy costume piece, but it is built on a simple, inexpensive base. Start with plain plastic glasses frames. Clean them well, then get creative with your sequin patterns. I love using tweezers to place each sparkling piece, working in small sections to avoid a gluey mess.
The real magic happens when you add tiny, battery-powered LED lights along the rim. Secure the wire with a bit of hot glue and tuck the battery pack behind an earpiece. Adding this sequined design to your collection of 100th day of school crafts brings a touch of sparkle to the day.
3. Assemble a Multicolor Pasta Bead Hundred Necklace
This one is a classic for a reason. After you have your vibrant colored pasta, the real fun begins. Thread your long string and start counting out groups of ten beads, creating a colorful pattern. I love seeing the necklace grow longer with each group. This necklace activity easily ranks among the most beloved 100th day of school crafts.
It is a fantastic hands-on way for early elementary students to visualize one hundred. For another classic project using everyday materials, try some fun clothespin crafts for kids. Feel the pride when they put it on.
4. Create a Fabric Marker Hundred Item Shirt
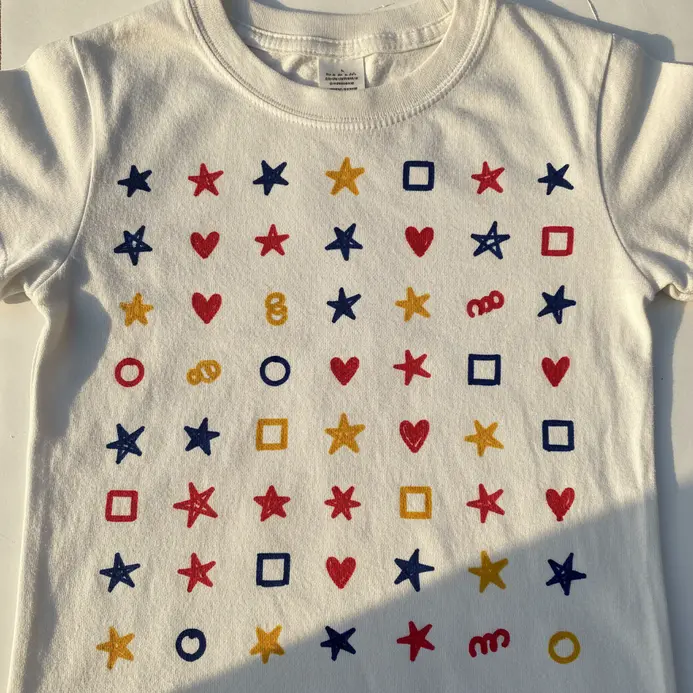
This one looks intimidating, but trust me, it is one of the most rewarding projects you can wear. The trick is to start with a brainstormed list of 100 items before you ever touch the shirt. I love how personal this gets, letting you fill the canvas with tiny drawings of everything from favorite animals to silly snacks.
Once your list is ready, place a cardboard insert inside the shirt to prevent bleed-through. Lightly sketch your items with a pencil first, then bring them to life with vibrant fabric markers. Preparing this fabric piece showcases how personalized 100th day of school crafts truly feel. Working in sections helps avoid smudging, and the fine tips are perfect for adding those fun details. The result is a completely unique piece of wearable art that tells a hundred little stories. For another great project that builds creativity, try these creative popsicle stick crafts.
5. Draw an Aged Appearance Self Portrait
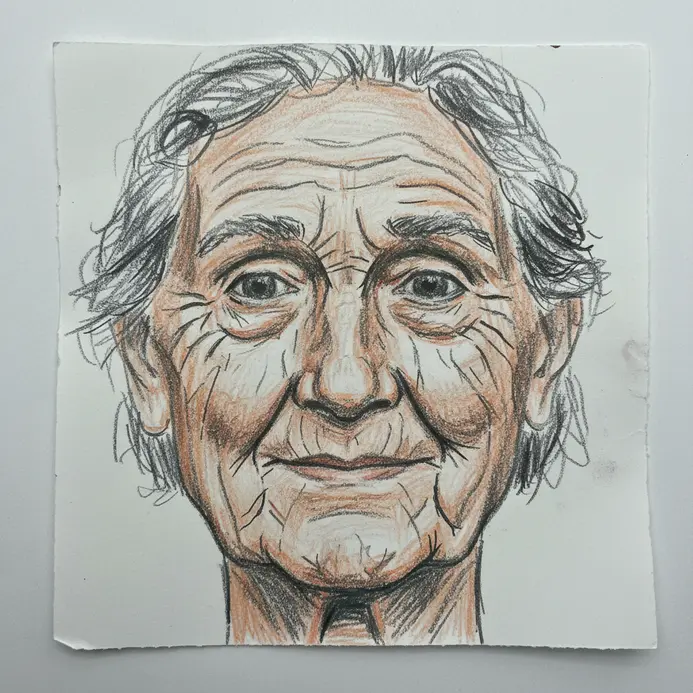
Ever wondered what you might look like decades from now? This drawing project is a fascinating exercise in observation. Start with a good photo of yourself in natural lighting as your base. Then, use a soft pencil to subtly add key changes like nasolabial folds, crow’s feet, and thinner lips, referencing how skin sags with age.
Drawing an aged version transforms a standard sketching session into a memorable addition to your 100th day of school crafts. I love how this makes you really study and appreciate the structure of a face. The payoff is a portrait that feels deeply personal and surprisingly artistic.
6. Assemble an Assorted Button Hundred Item Poster
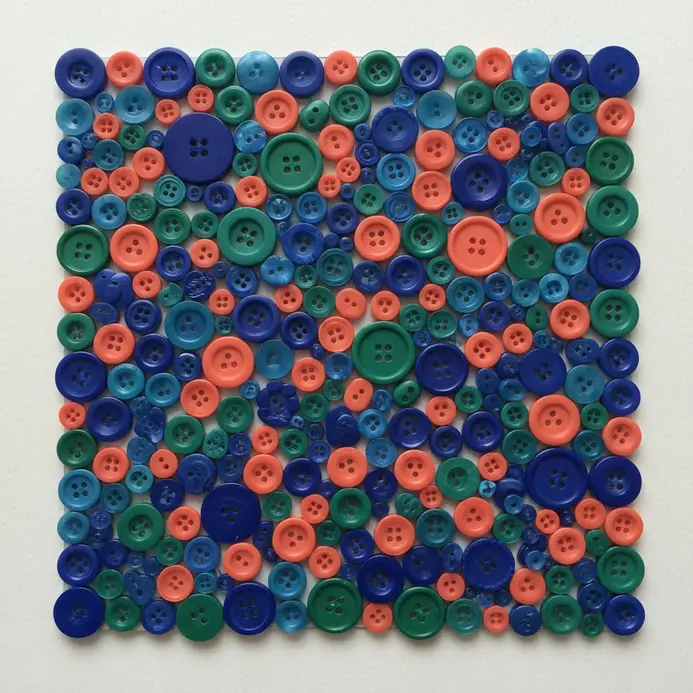
Ever looked at a jar of buttons and seen a hundred tiny stories? This project brings them all together in one vibrant collage. First, lay out your subtle, textured background and loosely arrange your 100 unique buttons. Glue them down securely, letting some overlap for a dynamic, collected look. Once dry, label each with a tiny number and description.
Assembling this button display shows why tactile materials elevate 100th day of school crafts. It works because the sheer variety creates a fascinating visual puzzle that celebrates the number 100 perfectly. I love how tactile and engaging this display becomes. For a fun alternative counting craft, try these easy perler bead projects too.
7. Build a Construction Paper Gumball Machine Collage
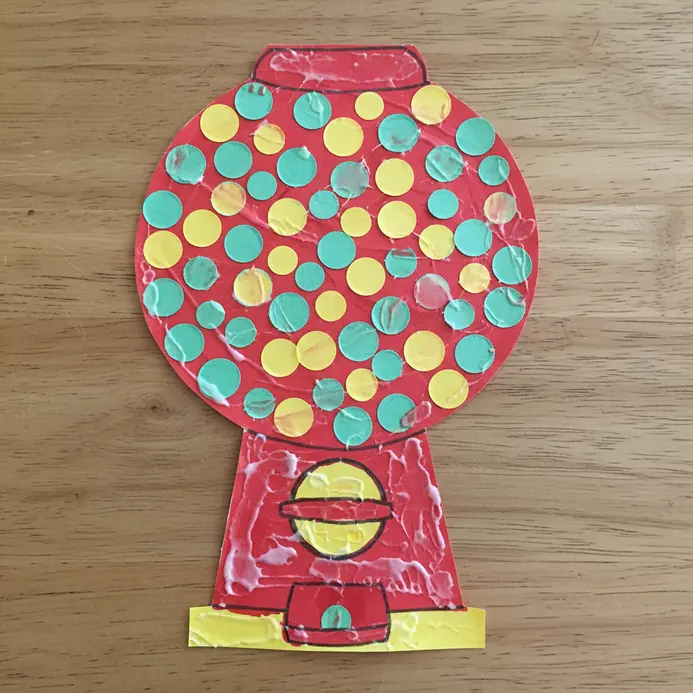
This one looks like a detailed art piece, but trust me, it is a simple cut-and-glue project with a huge visual payoff. Start by building the machine’s structure with construction paper rectangles for the base and a rounded shape for the glass dome. Then fill it with dozens of tiny, colorful paper circles to represent the gumballs. Constructing this paper scene highlights how versatile 100th day of school crafts become when you use basic geometric shapes.
I love how this craft turns basic shapes into a charming, nostalgic scene. The counting element makes it perfect for the 100th day of school, and the final collage is so vibrant. For another colorful project that kids adore, check out these suncatcher craft ideas.
8. Make a Cotton Ball Hundred Year Beard
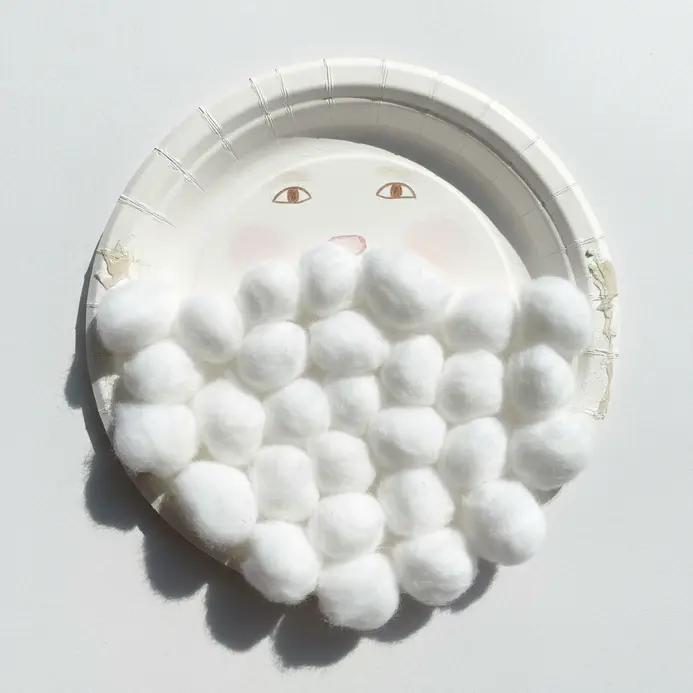
This one is a total crowd-pleaser for the 100th day of school. It looks intricate, but the process is wonderfully simple. You start by cutting a beard shape from a sheet of white felt. This becomes your soft, flexible base. Then, you simply fluff and glue cotton balls onto it, building up layers from the bottom to the top.
The magic is in the fluffing, and taking a moment to stretch each cotton ball ensures your 100th day of school crafts look full and textured. Trust me, taking a moment to stretch each cotton ball makes all the difference for that full, wizened look. Isn’t it satisfying to see that snowy volume come together? You will love how this whimsical prop sparks imaginative play.
9. Create a Geometric Shape Hundred Grid Mosaic
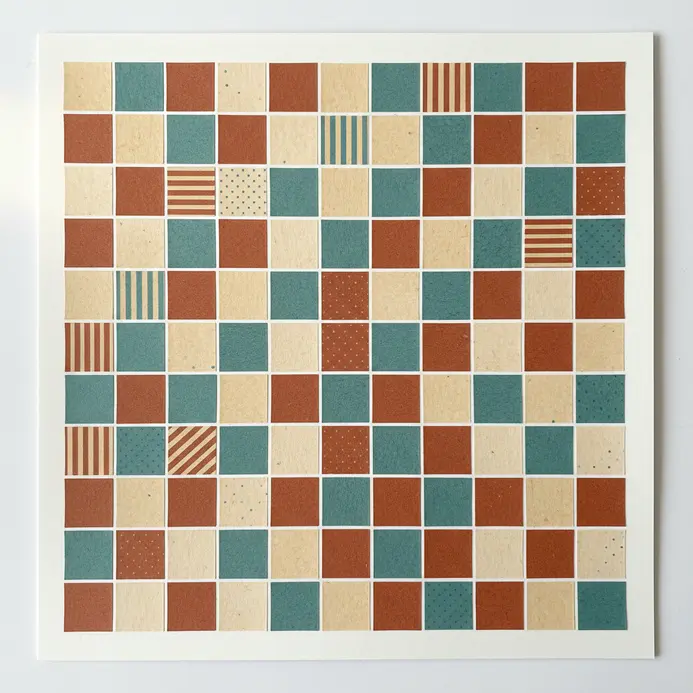
Ever thought math and art could not be best friends? This project proves they can. You will fill a 10×10 grid with simple geometric shapes like squares and triangles, and watch them combine into a stunning, cohesive pattern. I love how this turns a basic grid into a colorful exploration of symmetry and design.
Start by picking a theme and color scheme. Then, grab some large graph paper and colored pencils or markers to bring your vision to life. Planning your color scheme carefully prevents a disjointed look. This geometric approach reinforces how structured 100th day of school crafts teach valuable math concepts. It is incredibly satisfying to see your abstract or representational image emerge from the individual cells. seasonal halloween craft ideas.
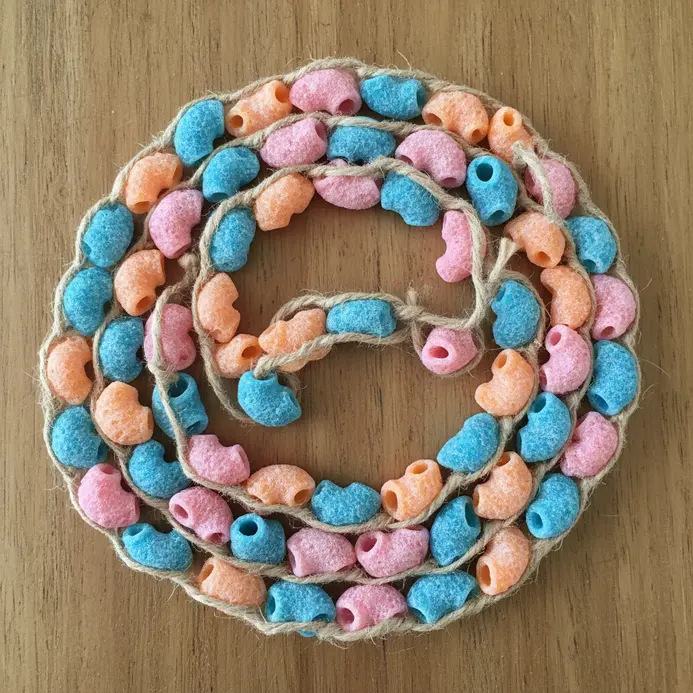
10. String a Cereal Loop Hundred Piece Bracelet
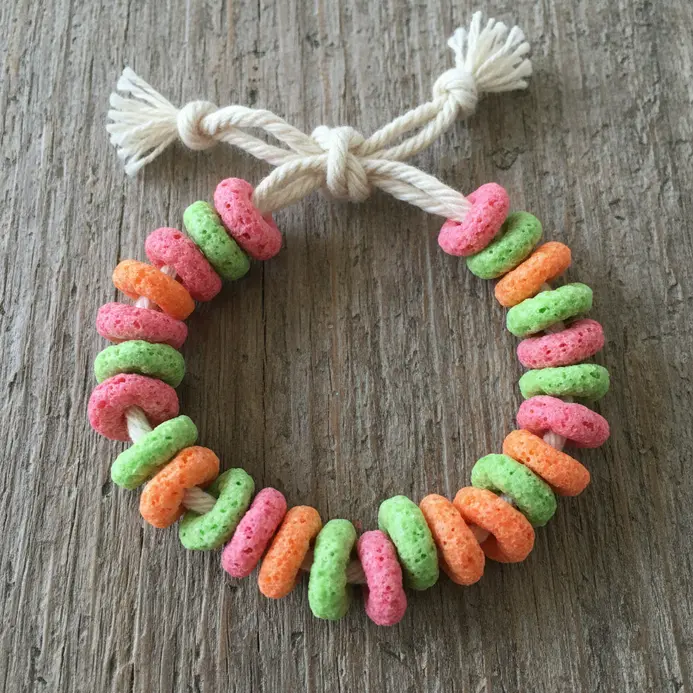
Who knew a simple breakfast cereal could become such a vibrant, fun accessory? This project looks intricate, but it is one of the most straightforward activities for little hands. You will need about 100 colorful cereal loops and a length of elastic cord. Stringing these edible pieces proves that quick 100th day of school crafts work beautifully for busy mornings. Threading them on is a fantastic exercise for fine motor skills, and kids love creating their own color patterns as they go.
Trust me, the key is using fresh cereal and leaving a good tail of string to tie a secure knot at the end. The final bracelet is a cheerful, wearable celebration of the milestone, and it makes for a perfect, simple family day craft activity. Is not that a sweet way to mark 100 days?
11. Build a Tissue Paper Hundred Tree Sculpture
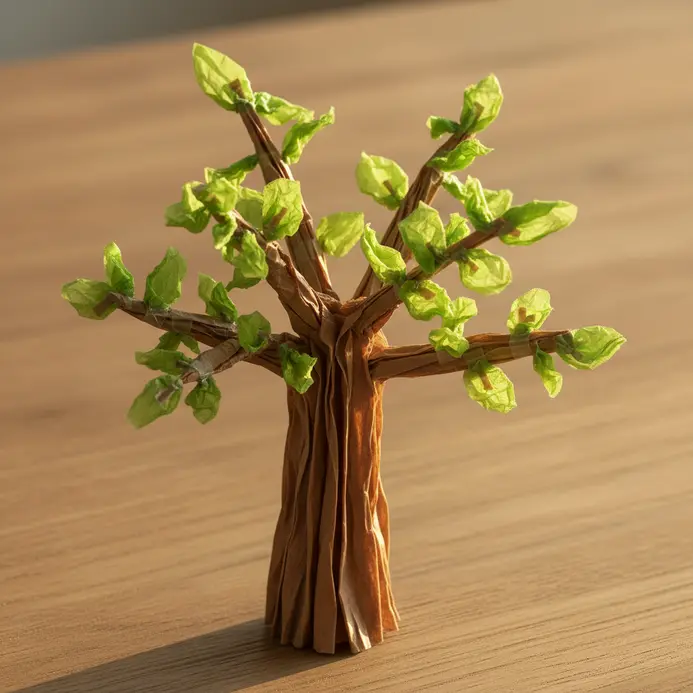
Ever wondered how to make a whole forest from a few simple materials? This project is all about creating the lush impression of a hundred trees, not counting each one. You will shape trunks from cardboard tubes or wire, then add layers of crumpled or fringed tissue paper for dense foliage. Gathering supplies early guarantees your 100th day of school crafts run smoothly from start to finish. I love how the repetition of simple forms builds into something so visually rich and textural.
Your key to success is planning a cohesive color palette and generous material amounts. Trust me, having plenty of tissue paper on hand lets you build up that full, layered look that makes the sculpture pop. Feel the satisfaction of watching your miniature forest come together.
12. Apply a Die Cut Sticker Hundred Display
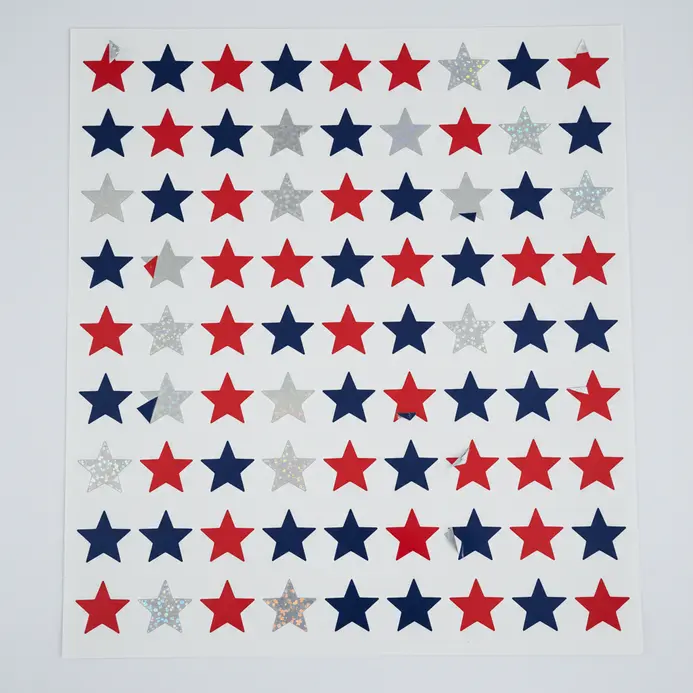
Ever wondered how to get a hundred of those cute little die-cut shapes to line up so neatly for your big classroom count? The secret is a masking tape hinge. First, clean your surface with isopropyl alcohol until it is spotless and dry. Mastering this taping method ensures your 100th day of school crafts look perfectly aligned on the wall. Place your sticker, then tape a strip across its middle to hold it perfectly in place.
This lets you peel back half the backing and smooth the sticker down without it ever shifting. I love this method because it gives you total control, which is a lifesaver when you are applying so many. It prevents bubbles and keeps your whole display looking crisp and consistent. mothers day crafts for kids.
13. Create Googly Eye Hundred Creature Art
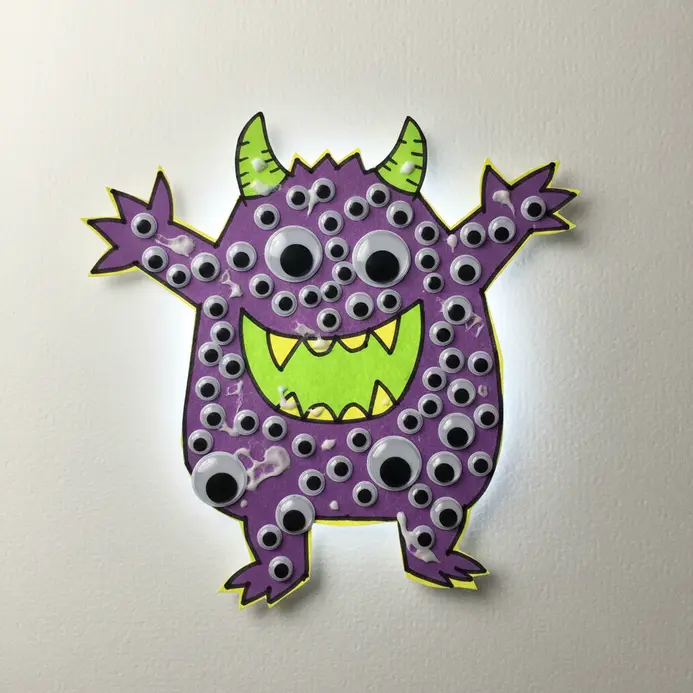
Ever wondered what to do with a giant bag of googly eyes? This project is the perfect, silly answer. First, pick your creature’s vibe and a base like cardboard or a canvas. Building these playful monsters shows why silly themes make 100th day of school crafts so engaging for little hands. Then, start gluing!
I love mixing eye sizes for personality, clustering them for a face or scattering them for a wild monster. The fun is in watching your unique hundred-eyed friend come to life. It is a fantastic creative exercise for kids, and you can find more playful project ideas with these fathers day crafts for kids. Feel the joy of making something wonderfully weird.
14. Make a Pom Pom Hundred Bug Creation
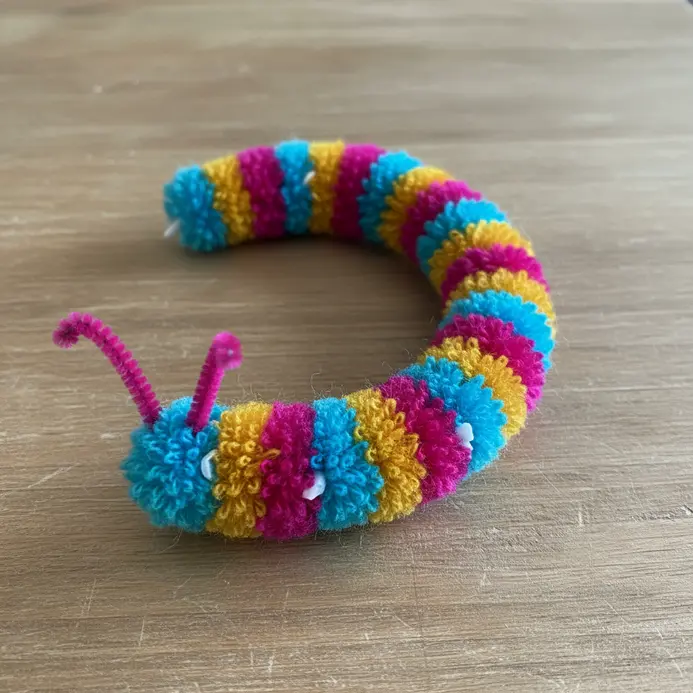
Ever wondered how to make a hundred of something feel manageable? This project breaks it down into delightful, tiny creatures. You will start by attaching googly eyes to each of your 100 colorful pom-poms. Then, you will bend and glue short pieces of pipe cleaner to create antennae and legs, letting kids invent ladybugs, bees, and all sorts of imaginary insects. It works so well because it turns a big counting goal into a playful, creative session.
Adding sturdy adhesive guarantees your 100th day of school crafts withstand enthusiastic handling. My favorite tip is to use a tacky craft glue for safety and a better hold on the fluffy pom-poms. You will love seeing your vibrant bug collection come together!
15. Build a Dried Bean Hundred Sorting Mat
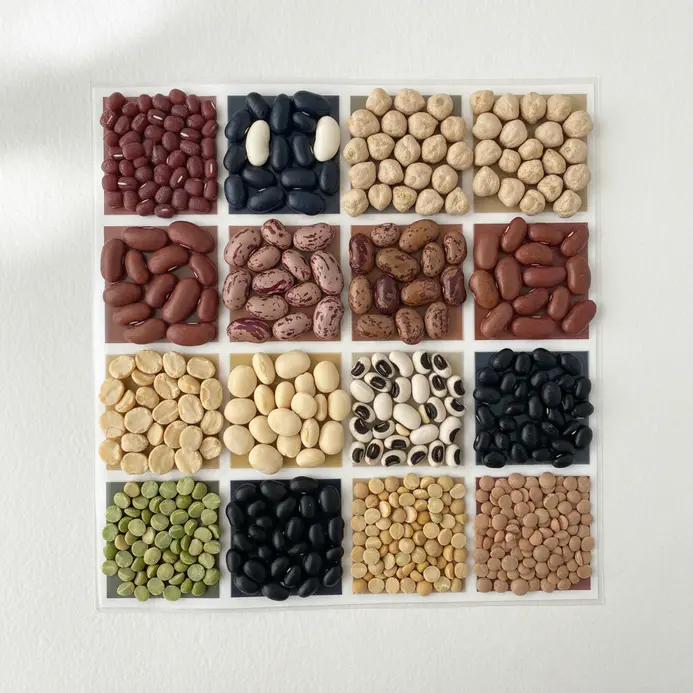
This tactile project is a classroom classic for a reason. You will create a simple mat with a 10×10 grid and let students fill each square with a dried bean or small counter. Grab a durable piece of canvas or poster board and carefully mark your grid with a ruler and permanent marker. Laminating your base ensures your 100th day of school crafts survive repeated counting practice. I love watching them concentrate as they place each item, counting aloud all the way to one hundred.
The real magic happens when kids use their fine motor skills to pick up and place the beans, developing that essential one-to-one correspondence. thanksgiving crafts for kids. Feel the satisfaction when that last bean clicks into place.
16. Assemble a Paper Chain Hundred Link Garland
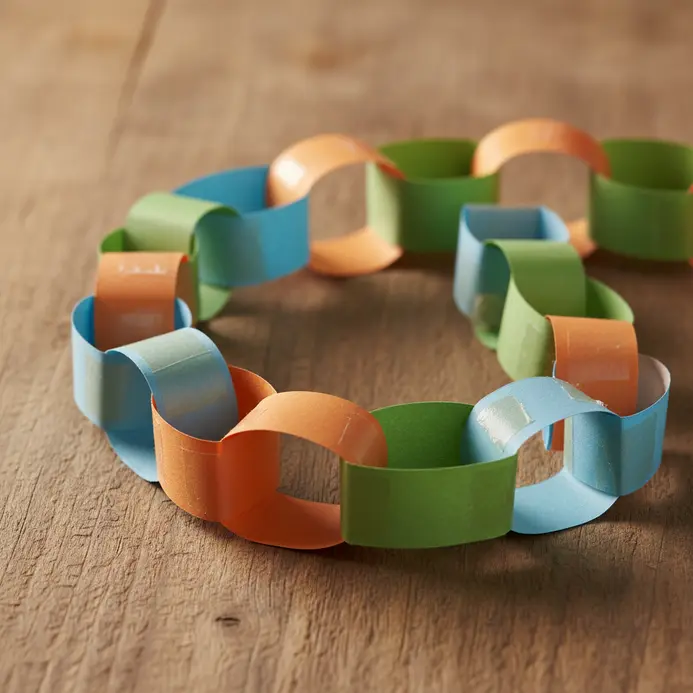
Does a paper chain sound too simple to be satisfying? Trust me, the magic is in the rhythm of looping and linking. You will cut 100 strips, each about an inch wide, from construction paper. Then you form your first loop with a glue stick or stapler. The next strip threads through that loop before you seal it, and you just keep going. I love how the chain grows longer with every link, giving you a real visual count to one hundred. For another fun holiday activity, check out these easter crafts for preschoolers.
17. Stamp a Pencil Eraser Hundred Print Painting
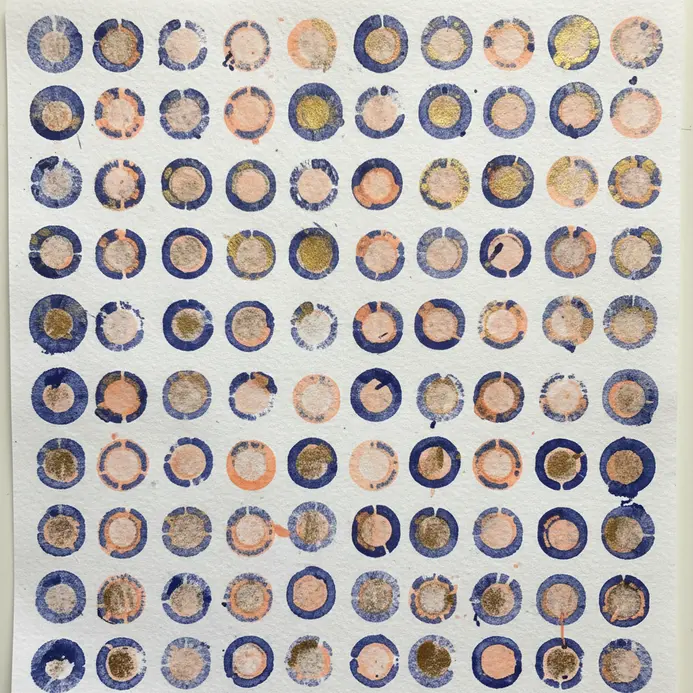
Who would have thought a simple school supply could create such a cool textured painting? This is a fantastic way to build up a unique artwork one tiny print at a time. You will load a clean pencil eraser with acrylic paint and stamp it over and over onto your paper. Trust me, the final result, with all its little dots, feels incredibly satisfying to create. I love how this repetitive action is so meditative and lets you watch a pattern emerge.
18. Create a Felt Shape Hundred Patch Collage
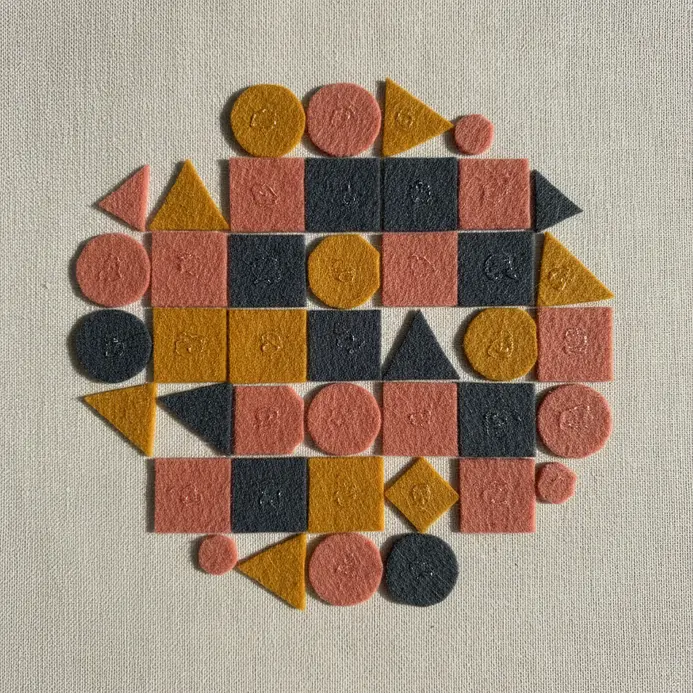
Does making 100 of something sound daunting? I love this project because it breaks that huge number into small, manageable steps. You start by cutting 100 identical squares from felt, then decorate each one with a unique felt shape like a star or heart. Once all your patches are ready, you arrange and glue them onto a large felt base.
The magic happens when you step back and see that colorful, tactile masterpiece full of counting practice. Trust me, using fabric glue for the assembly is a safer, more flexible choice for little hands. The final collage is a stunning visual reward for their persistence, and you can find more creative painting ideas for kids to keep the artistic momentum going.
19. Build a Candy Corn Hundred Piece Sculpture
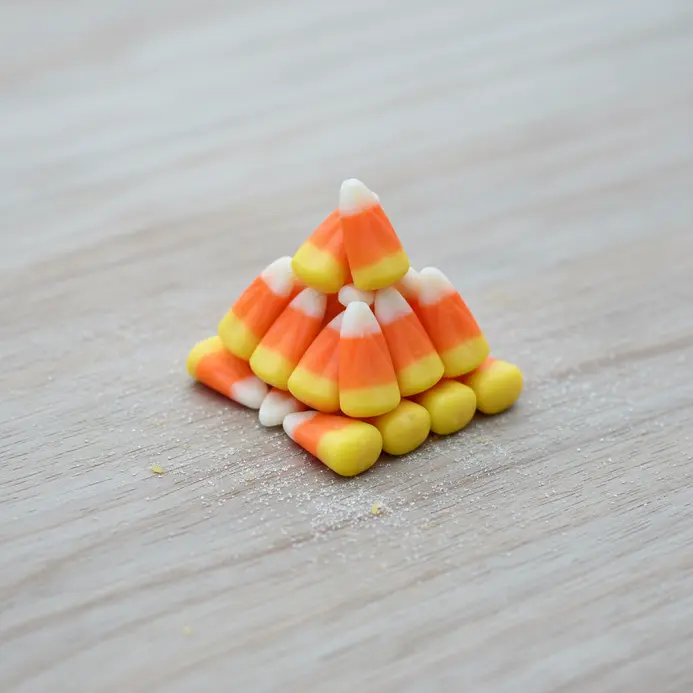
This one looks impressive, but trust me, the technique is super simple. You are essentially stacking candy corn pieces using a dab of royal icing or melted chocolate as your glue. Build a wide base first, then offset each new layer like bricks for a stable, pyramid-like structure.
Why does this work so well? It turns a simple counting exercise into a colorful, hands-on sculpture that celebrates the number perfectly. I love that you can get creative with the shape once you have the hang of it. diy keychain projects.
20. Make a Construction Paper Hundred Dot Monster
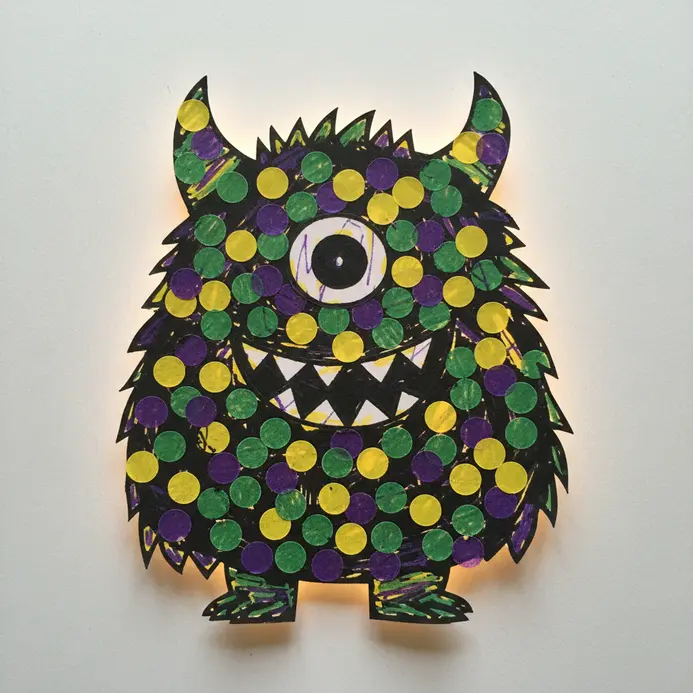
This monster project turns a simple counting task into a wildly creative art session. You start by cutting out a big, fun monster shape from construction paper, then let kids go wild adding googly eyes, spiky horns, and a toothy grin.
The real magic happens when you decorate it with 100 dots. Use a hole punch for perfect circles, or get messy with paint and cotton swabs. Trust me, the tactile fun of sticking on all those colorful dots is the best part. You will love seeing each unique, dot-covered creature come to life.
Displaying Student Work for Centennial School Celebrations
Create a powerful visual impact by mounting each student’s finished craft on a uniform black background before arranging them in a grid on the hallway wall. This technique makes the vibrant colors of their 100-piece creations pop and ties disparate projects, from paper chains to collage crowns, into one cohesive exhibit. The fastest way to add a professional touch is to use a simple double-sided tape runner for a clean, wrinkle-free mount.
You want to include a small laminated card with each child’s name and a title like ‘Emma’s 100 Gumballs’ to personalize the display and celebrate their individual achievement. Grouping the projects by class or arranging them to form a giant ‘100’ on the wall turns your display into a central talking point for the whole school celebration.
Conclusion
Seeing your students’ faces light up as they hold up their finished projects, each one a testament to their counting skills and creativity, is what makes this day so special. These 100th day of school crafts are designed to make that moment happen smoothly, giving you more time to celebrate with your class and less time stressing over complicated instructions. My best advice? Pick one or two that fit your current supplies and class vibe perfectly, and just dive in. The real joy is in the shared experience of making something together to mark this big achievement.
FAQs
Q: How do I manage a craft that requires 100 small items with young students?
A: Pre-sort items into groups of ten. Use small cups, muffin tins, or egg cartons to organize the pieces. This makes counting manageable for students and prevents items from getting mixed up or lost.
Q: What if I do not have the exact materials listed for a craft?
A: Feel free to substitute. Swap pasta for beads, cereal for pom poms, or buttons for stickers. The goal is counting to 100, so any small, countable item you have on hand will work perfectly.
Q: Are these crafts suitable for students with different skill levels?
A: Absolutely. Many projects, like dot monsters or sticker displays, focus on placement and counting with minimal fine motor demand. Others, like bead necklaces, offer a good challenge. You can often simplify a step, like pre-cutting shapes.
Q: How long do these 100th day of school crafts typically take?
A: Most projects are designed for a 30-45 minute class period. The time varies with student age and group size. Having materials pre-sorted and a clear example to show the class will help everything run smoothly.
Q: Can these crafts be sent home the same day?
A: Yes, most use fast-drying glue or require no drying time at all. Projects like crowns, necklaces, and drawings are perfect for students to proudly take home and share with their families immediately.


